Overview of Team Management

Olivia Reyes
Running a successful Amazon business is rarely a solo mission. As your brand grows, the volume of data, keyword tracking, and product research can quickly become overwhelming for one person. The Team Management section is designed to transform SoldScope from a personal dashboard into a collaborative command center.
By bringing your team into the platform, you can:
Maintain Absolute Security: Stop the risky practice of sharing your master password. Invite team members to their own accounts and keep your billing and sensitive owner data private.
Optimize Workflow: Delegate specialized tasks. You can have a Virtual Assistant (VA) focused solely on finding new opportunities in Product Research while an SEO specialist manages your Rank Tracker.
Scale Effortlessly: As you hire more help, you can easily add, suspend, or remove users to match your current business structure.
Team Management allows you to grant specific access levels to different members of your organization. You can monitor your team's size and activity through the main dashboard, which tracks Total Members, Active users, Pending invitations, and Suspended accounts.
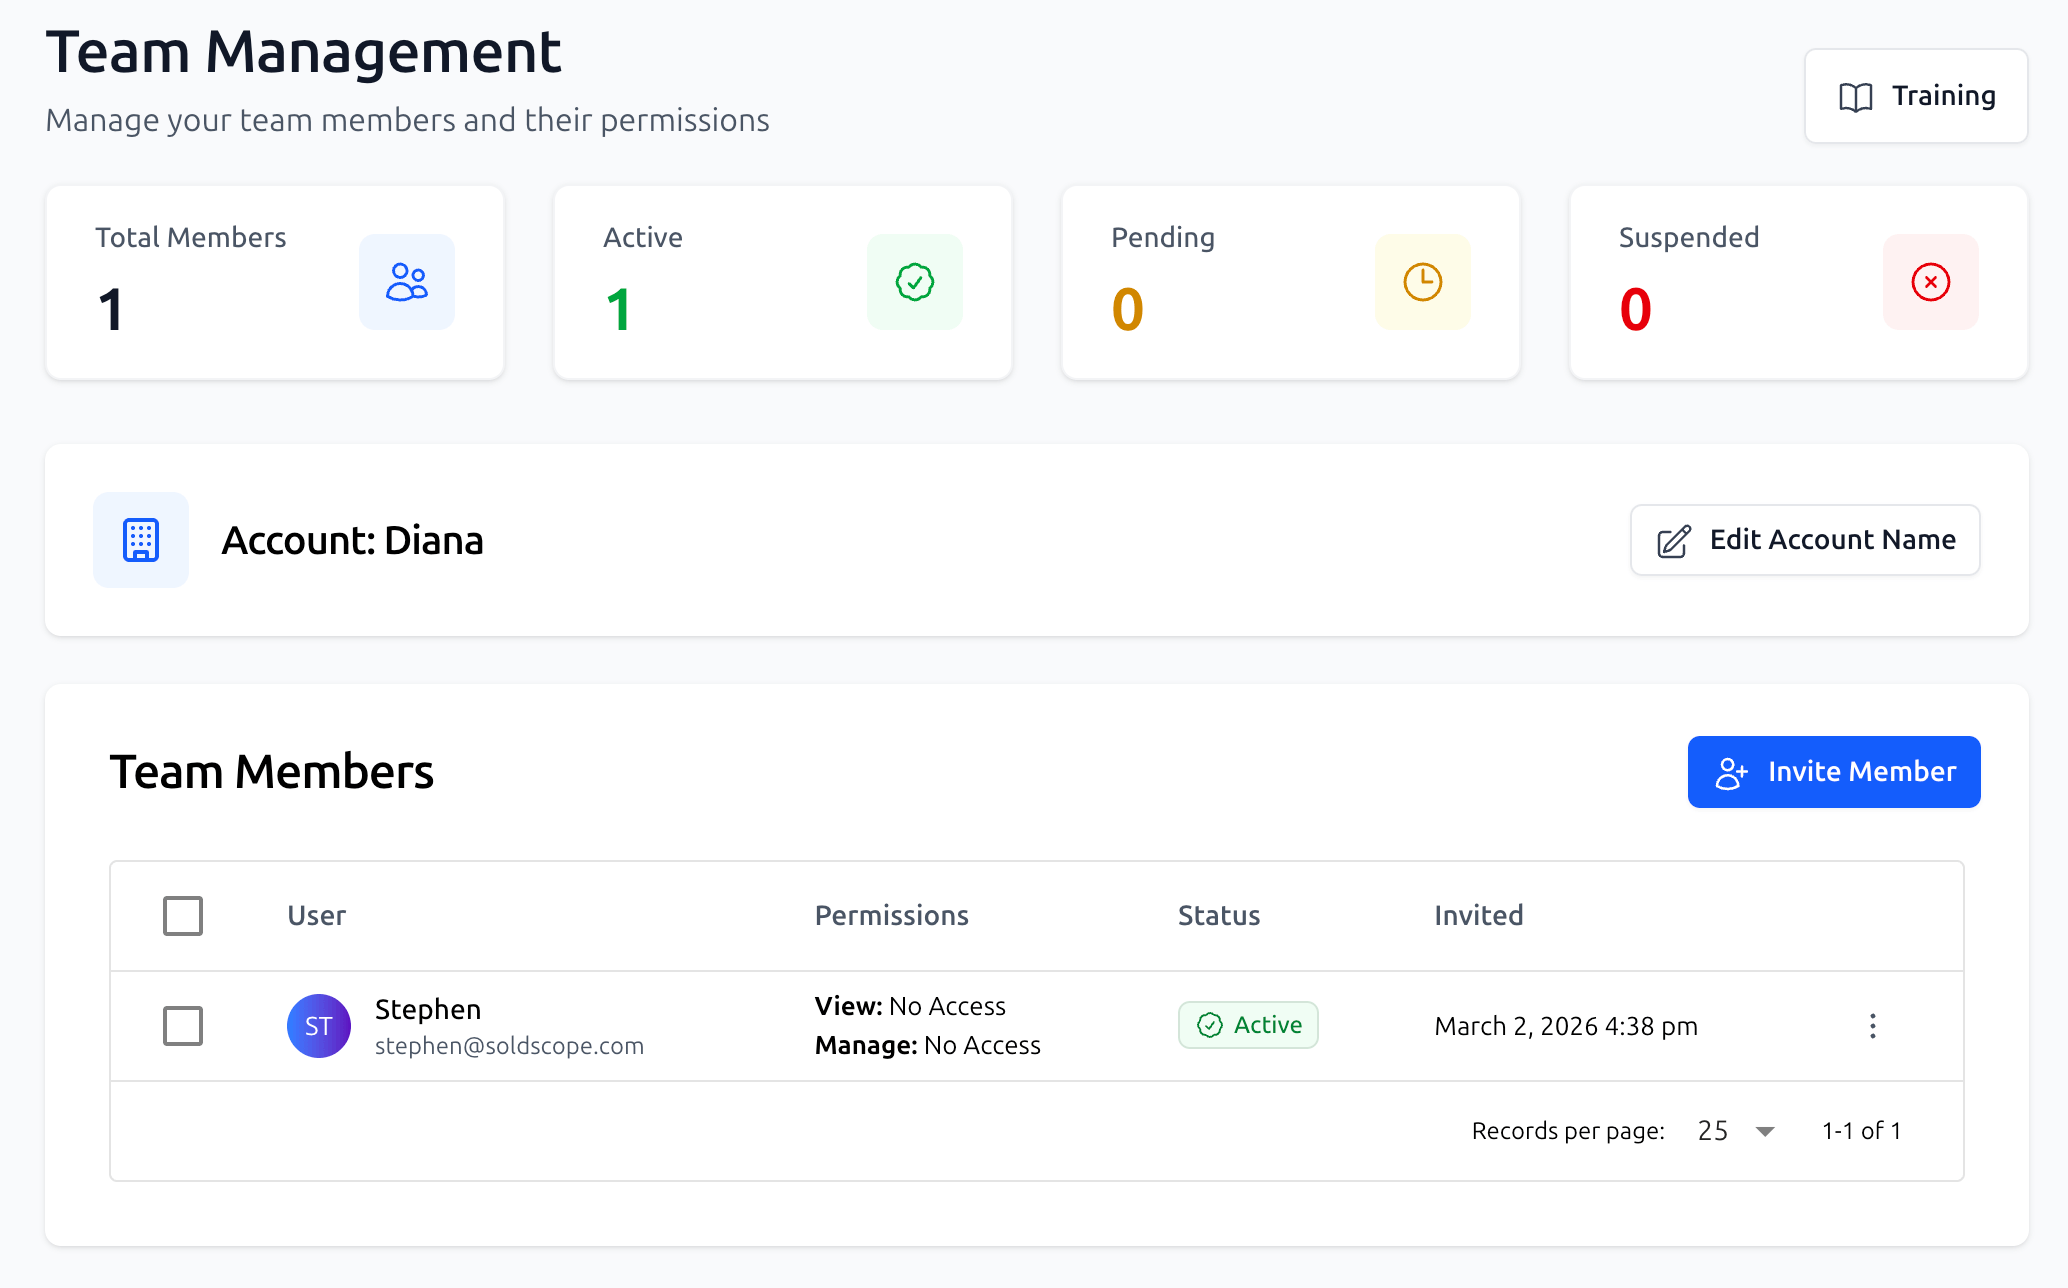
Note: The total number of members you can add to your team depends on your current SoldScope subscription plan.
Inviting a New Member
To start building your team, follow these steps:
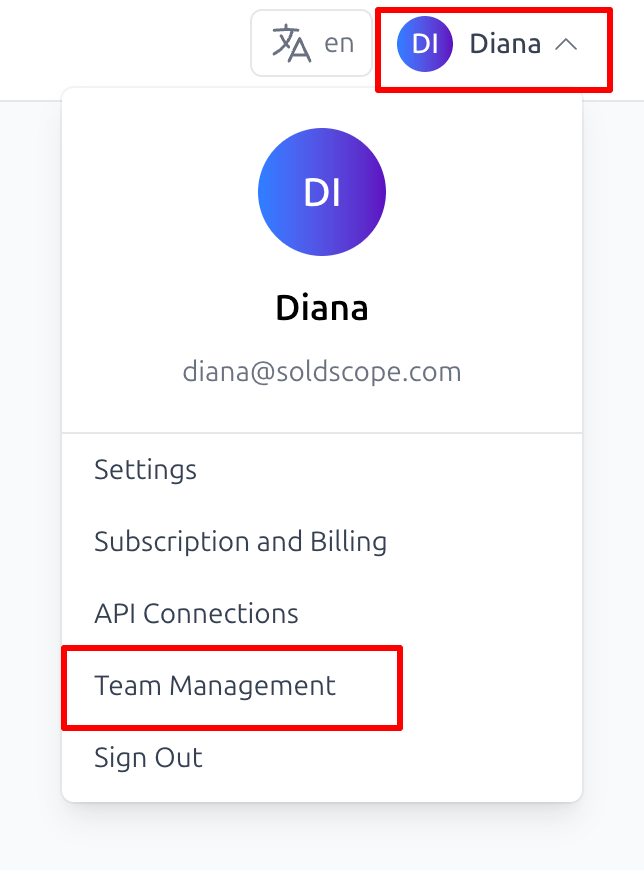
Access the Section: Open your user profile menu in the top right and select Team Management.
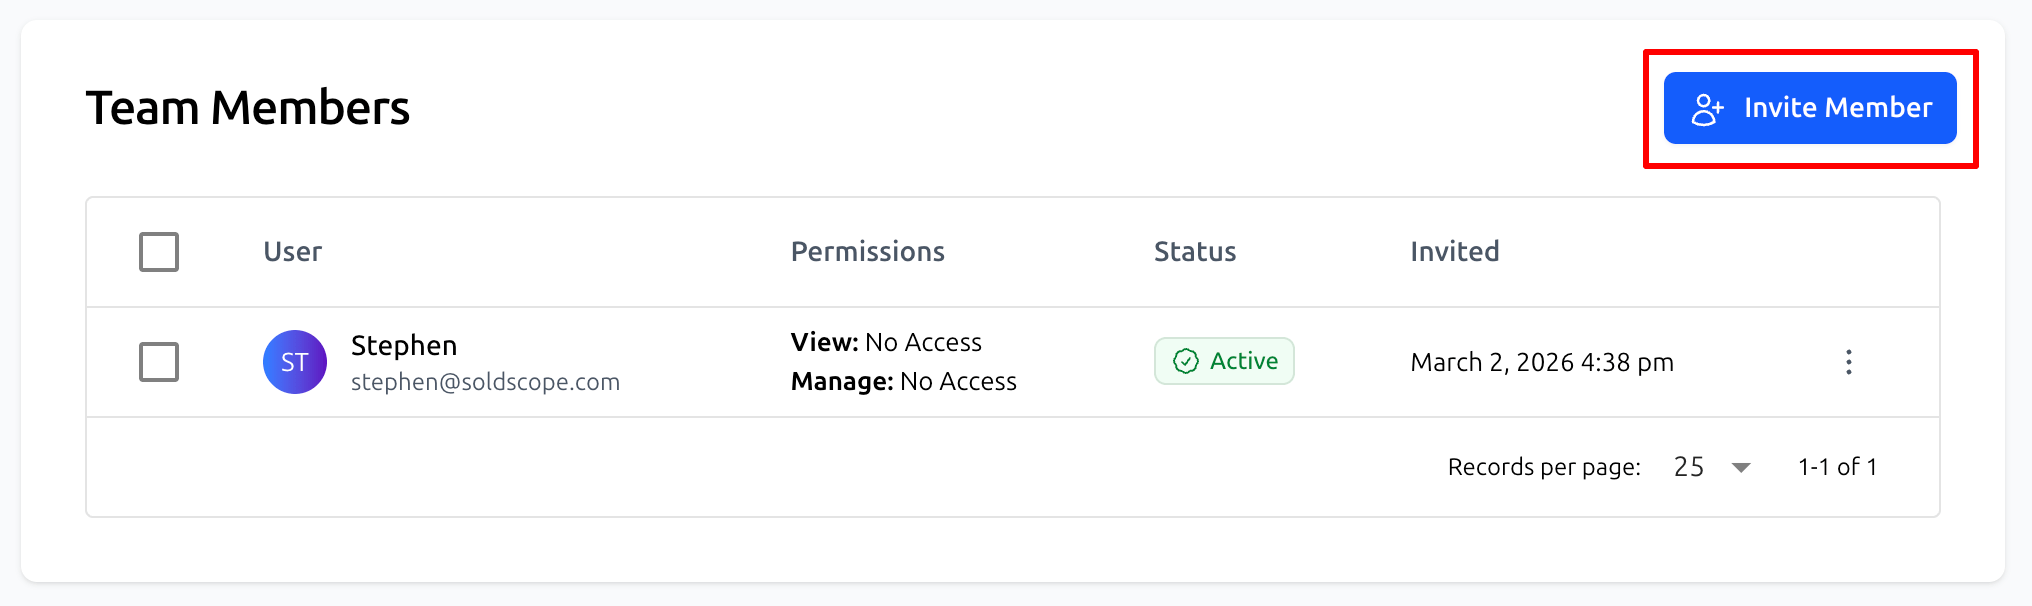
Start Invitation: Click the blue Invite Member button.
Enter Details: In the popup window, provide the teammate's Email Address and Full Name.
Send: Click Send Invitation.
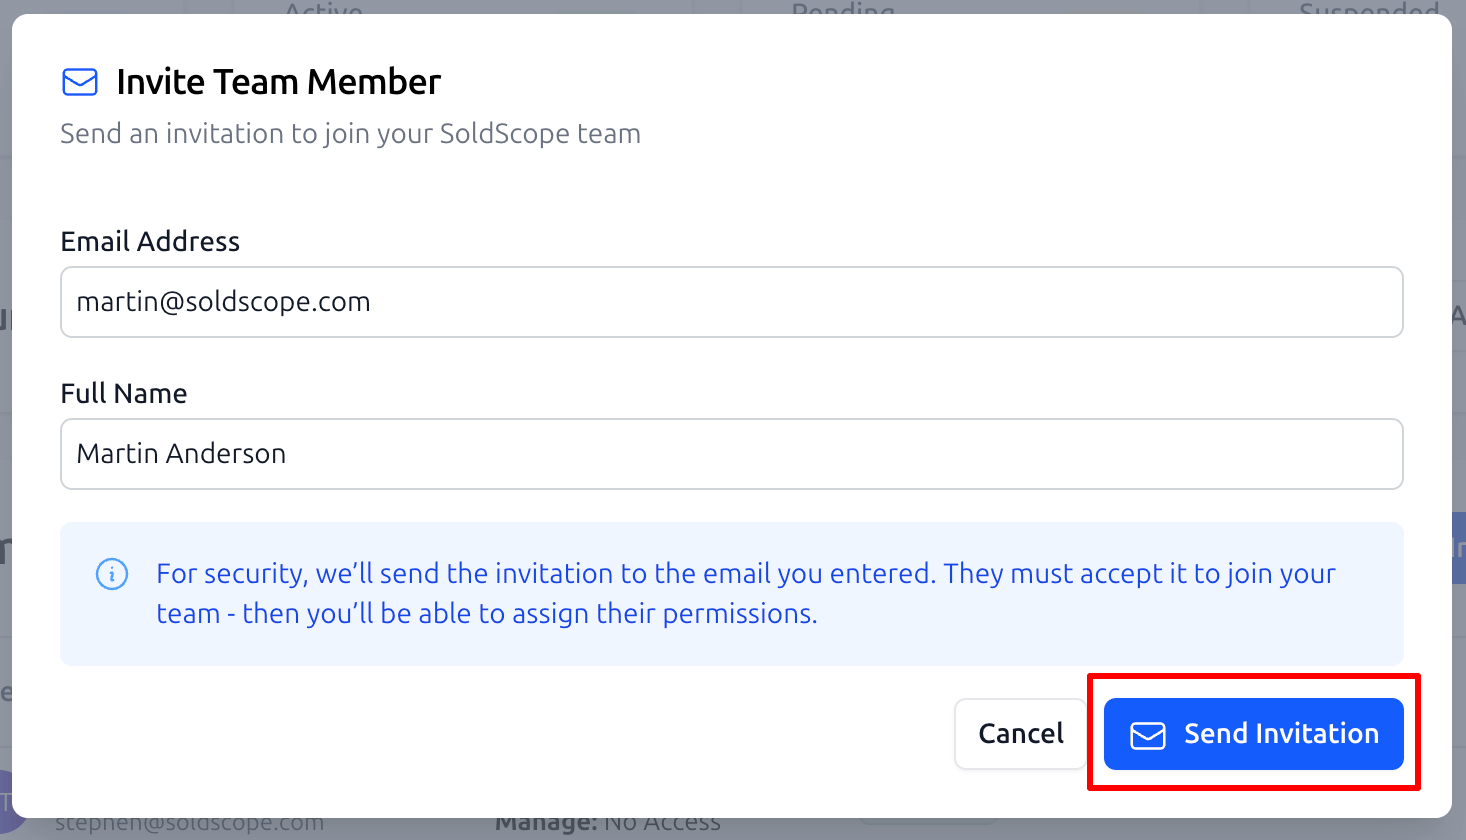
For security reasons, the user must accept the email invitation before you can assign specific tool permissions.
Managing Pending Invitations
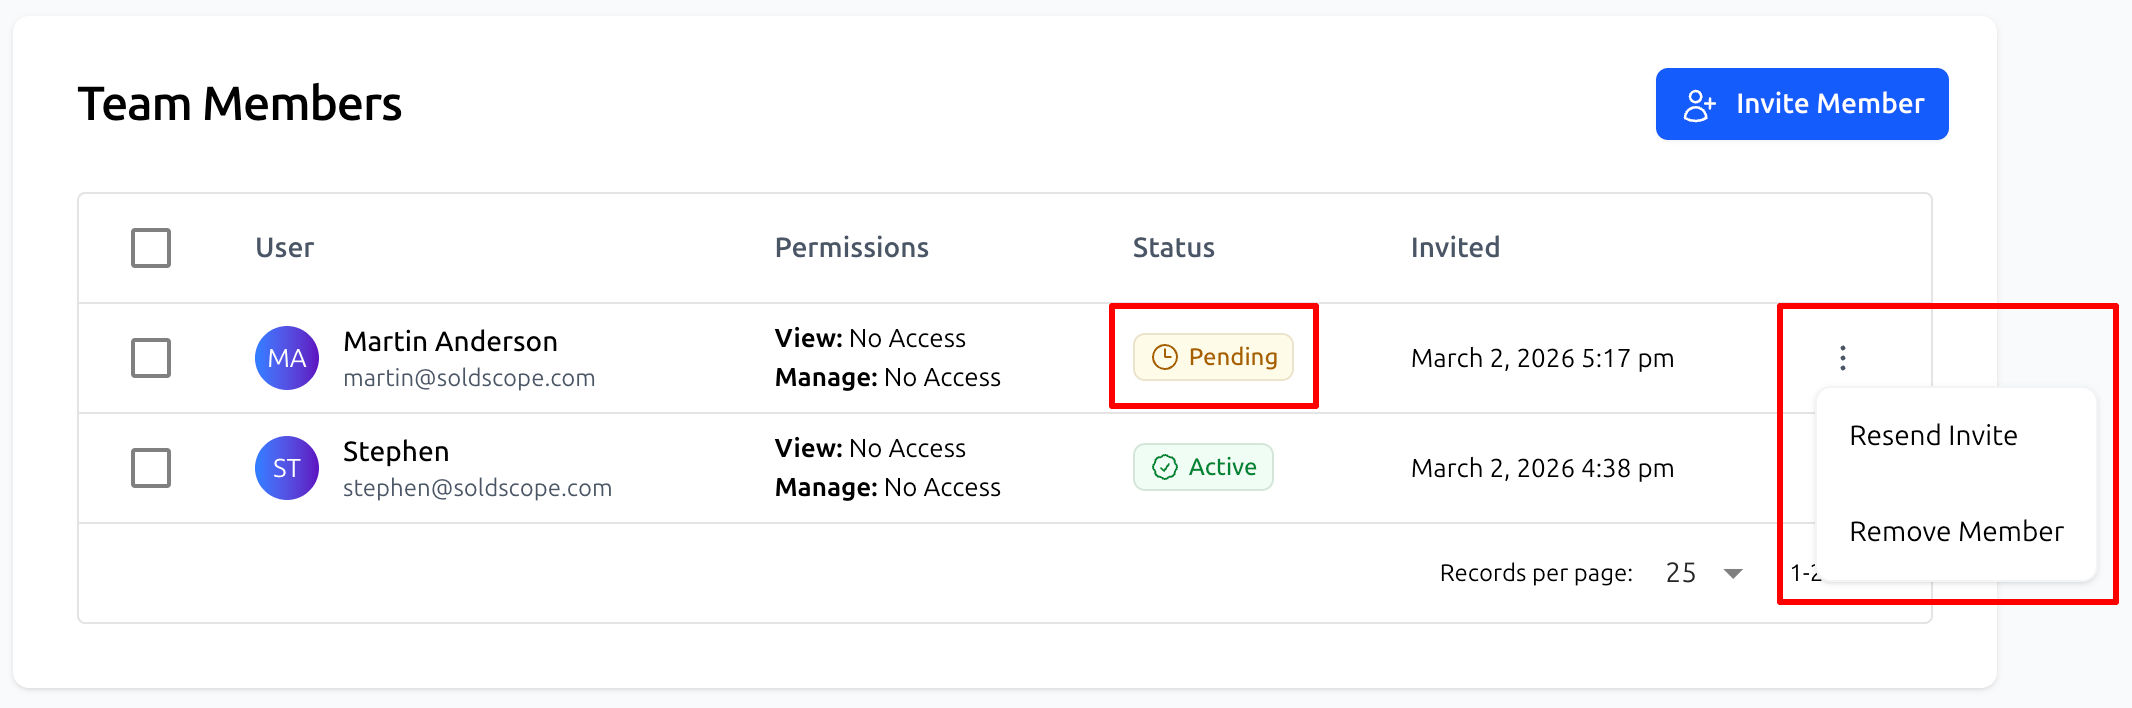
Once an invitation is sent, the user will appear in your Team Members list with a Pending status. During this stage, you can click the three-dot menu icon on the right to:
Resend the invitation if it was missed or buried in their inbox.
Remove the user if the invitation was sent to the wrong address.
The list also displays the exact date the invitation was issued so you can track follow-ups.
Configuring User Permissions
Once a member accepts their invitation and creates their account, they will move to Active status.
Safety First: By default, all new team members are granted No Access to any tools. You must manually define their permissions before they can see or manage any data in your account.
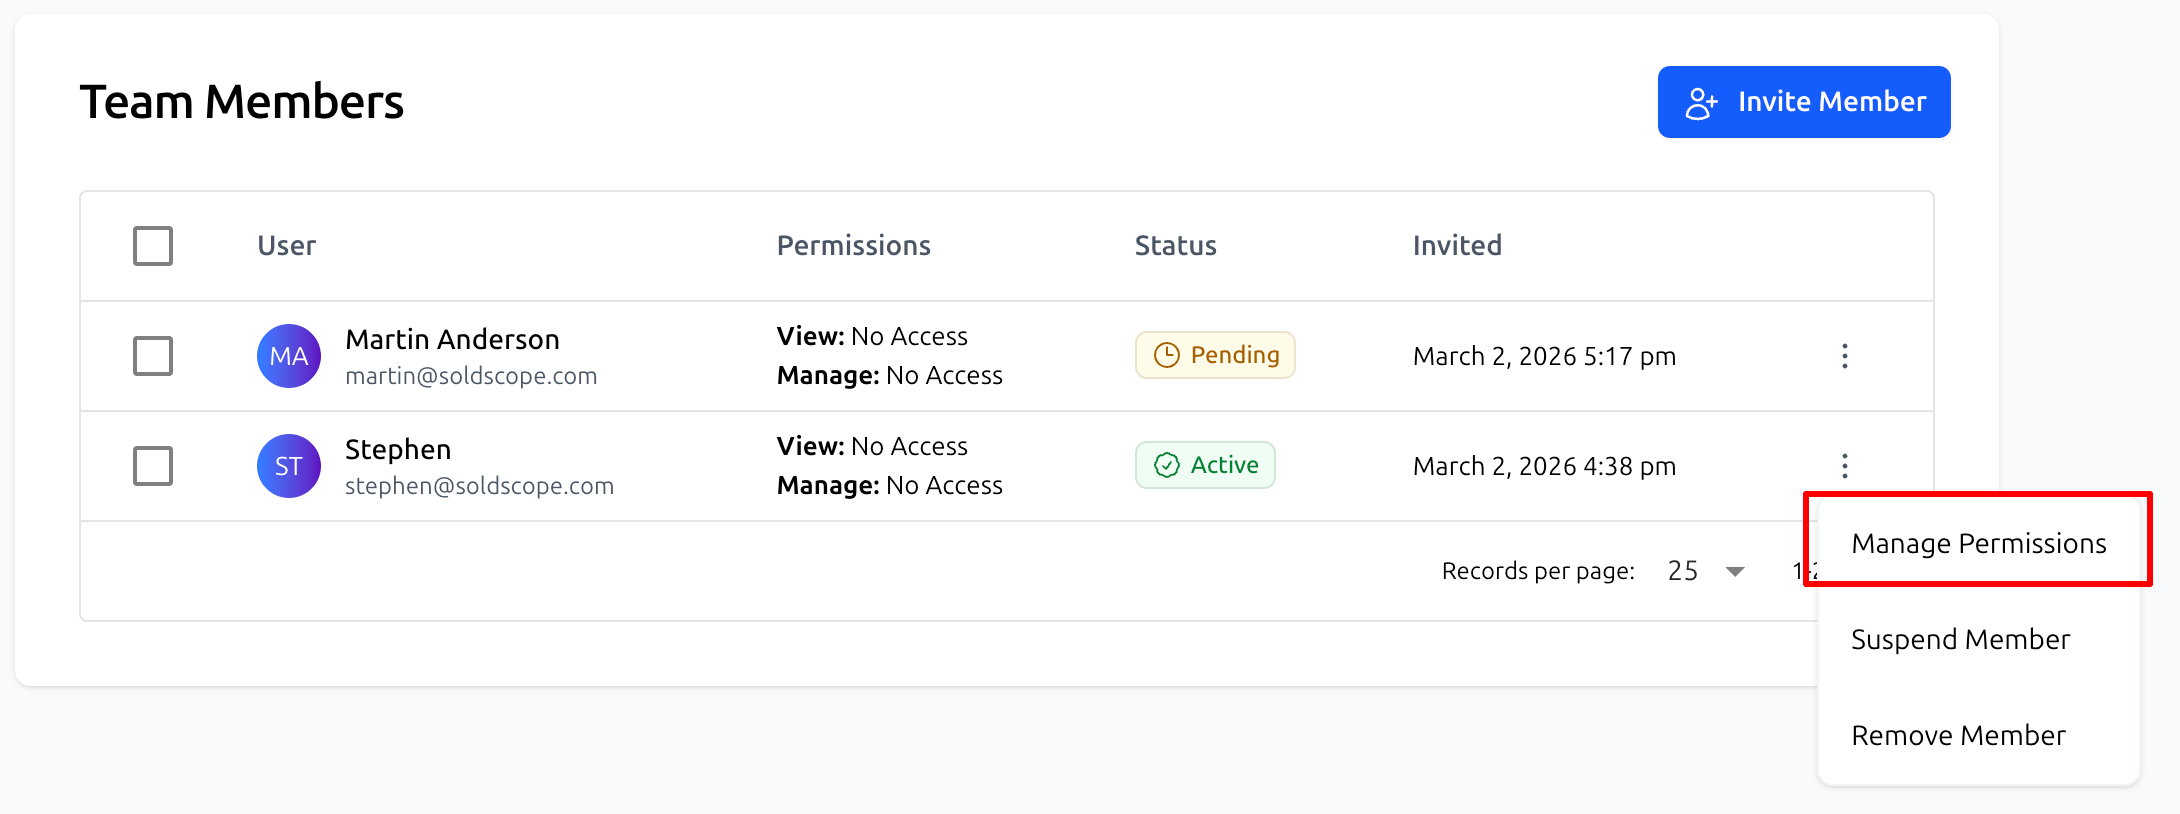
To manage permissions for a team member:
Locate the user in the Team Members table.
Click the three dots icon in the actions column on the right.
Select Manage Permissions from the dropdown menu.
A modal window will appear. Configure the access toggles for each tool and save your changes.
Permissions are divided into two distinct levels:
View Access: The user can see data and reports within the tool but cannot change settings, add new tracking, or delete information.
Manage Access: The user has full control to edit, add, or delete data within that specific tool.
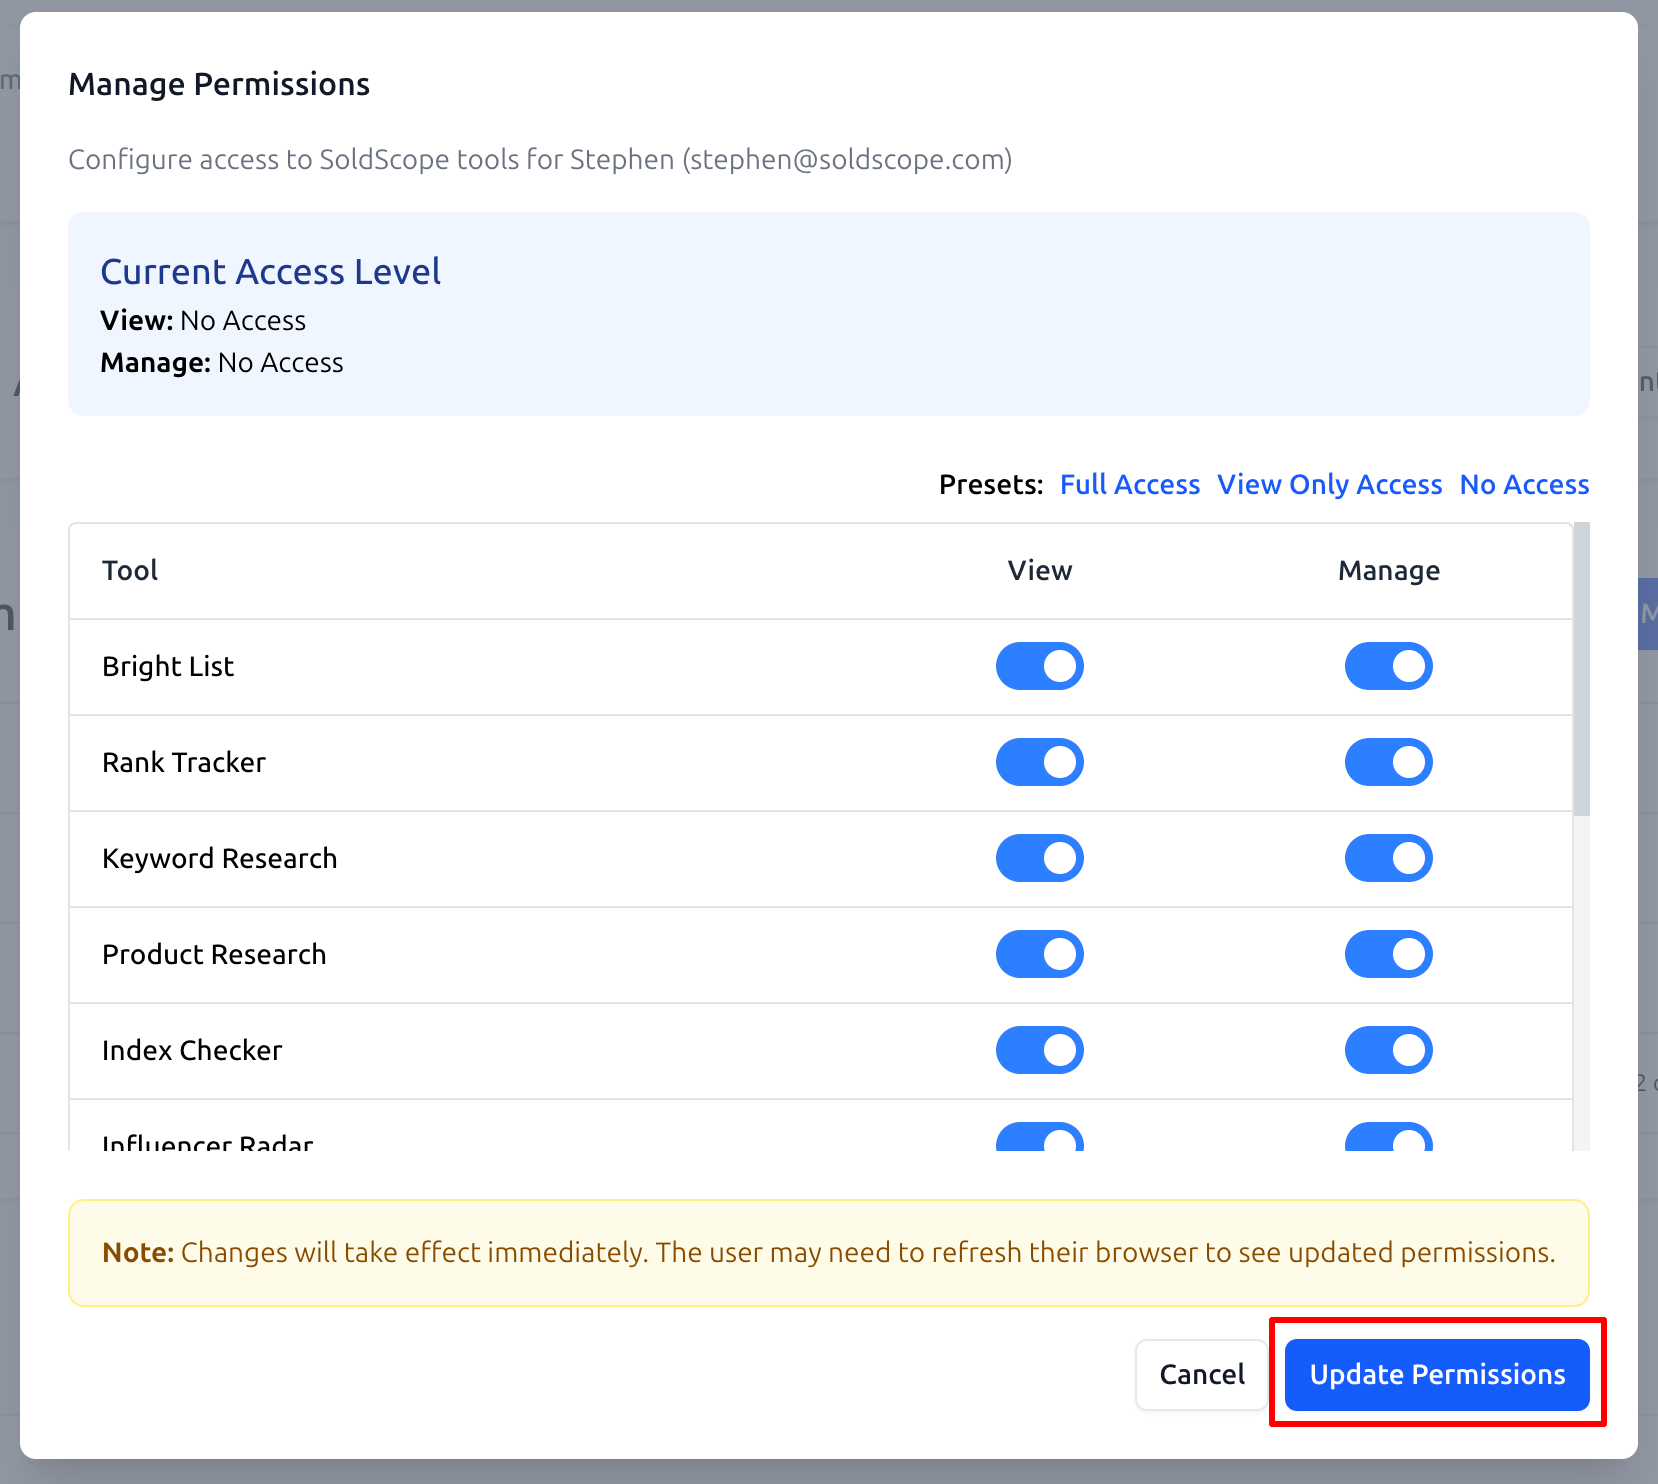
Key Features:
Presets: Use these to quickly toggle all tools to Full Access, View Only, or No Access simultaneously.
Granular Control: This allows you to fine-tune access for individual modules, such as the Rank Tracker, Keyword Research, or Product Research.
Instant Effect: Changes take effect immediately after saving. If the user is currently logged in, they simply need to refresh their browser page to see the updated access.