Getting Started: Creating Your First Listing

Olivia Reyes
The creation flow in SoldScope is designed to be a guided, flexible experience. Whether you are launching a brand-new product or optimizing an existing one, the setup wizard helps you build a solid foundation of data before you start writing.
Step 1: Choose Your Creation Method
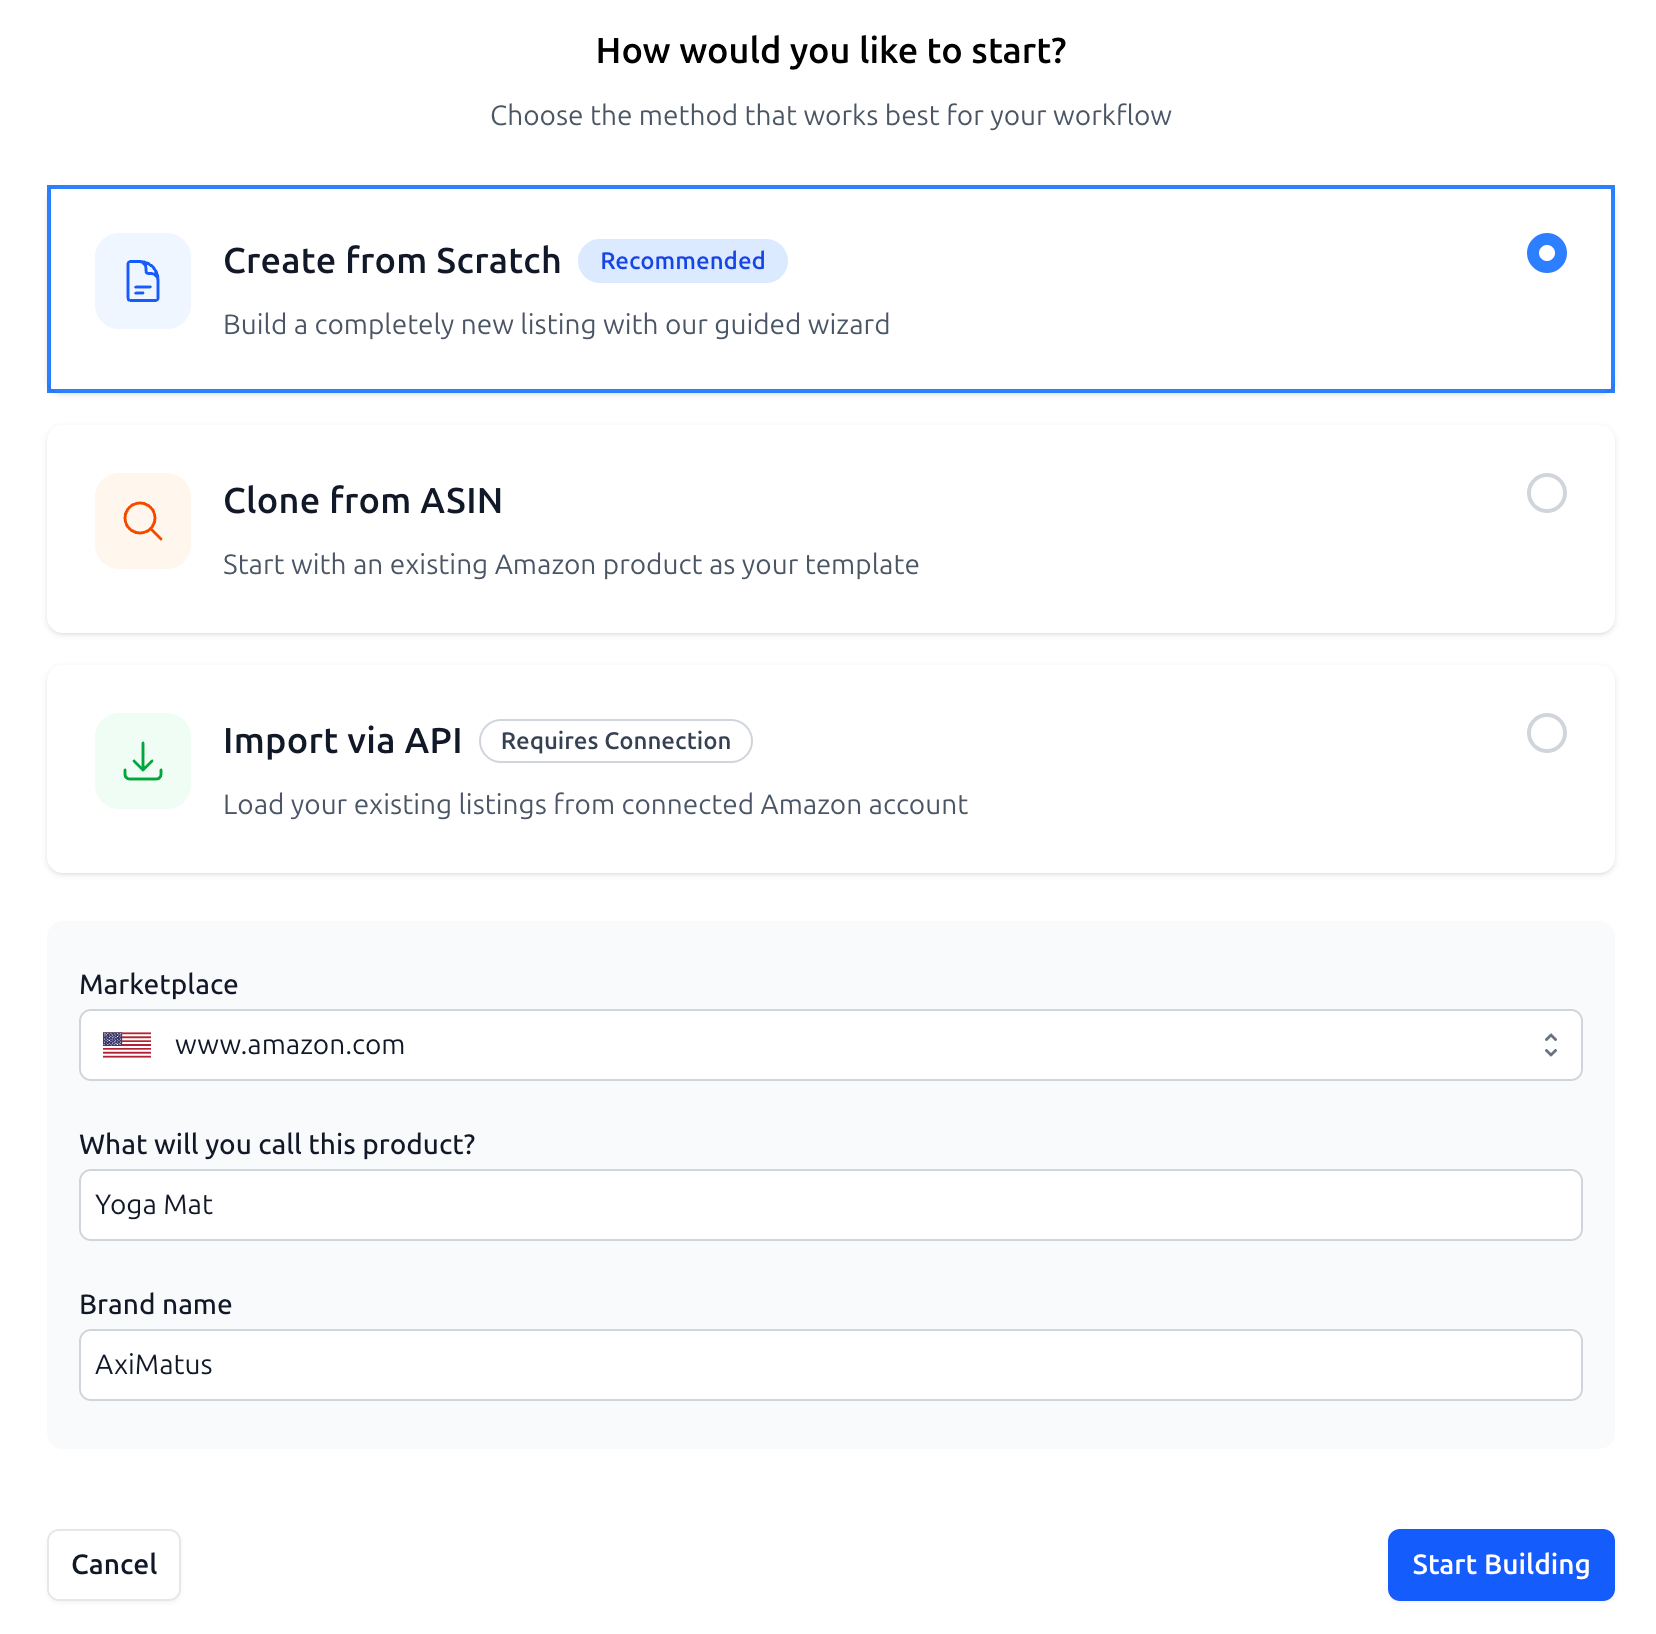
To begin, click the Create Listing button on the main Listing Builder dashboard. You will be presented with three ways to start your project:
Create from Scratch: Best for new product ideas where you want to build the SEO strategy from the ground up.
Clone from ASIN: Ideal for analyzing or mimicking a successful competitor. Simply enter an ASIN, and SoldScope will pull the existing content to use as your baseline.
Import via API: If your Amazon Seller Account is linked, you can import your existing listings directly. This ensures all your current data is synced and ready for optimization.
Once you have chosen your method and entered the required basic information, click Start Building to move forward.
Step 2: Establish the Competitive Landscape (Optional)
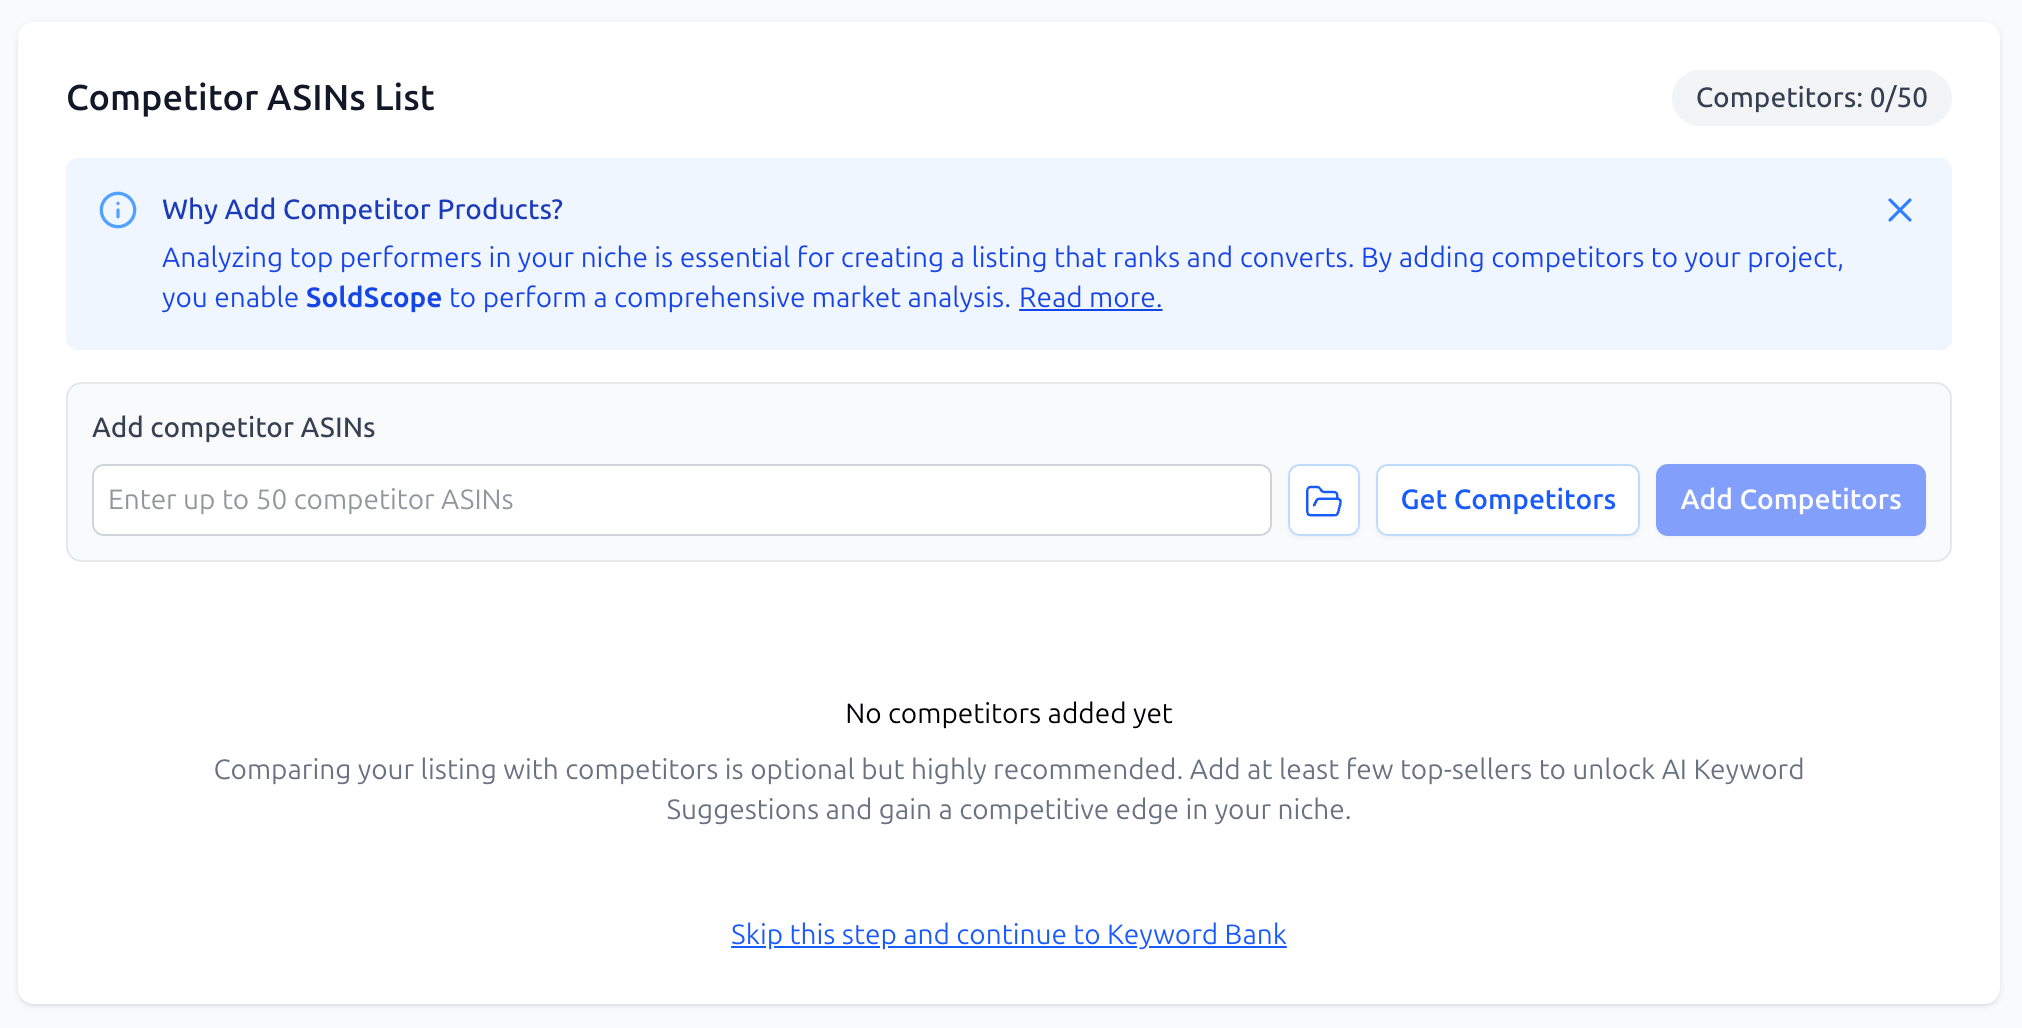
The next step is the Competitor Management page. While this step is optional and can be skipped, we highly recommend adding rivals at this stage.
By identifying your competitors early, you unlock the ability for our AI to suggest keywords and provide a side-by-side comparison in the Leaderboard later on. If you're in a hurry, you can skip this and return to it at any time via the "Competitors" button in the editor.
Learn More: Check out our detailed guide on Competitor Analysis and the Leaderboard for tips on picking the right ASINs.
Step 3: Populate Your Keyword Bank (Optional)

After competitors, you will move to the Keyword Bank setup. Here, you can begin gathering the search terms you want to rank for.
This is the "SEO foundation" of your listing. Like the competitor step, this is optional during the initial setup; you can always add, remove, or cluster your keywords later while you are actually writing.
Learn More: See our guide on Working with the Keyword Bank: From Chaos to System to learn about importing from Bright Lists and using AI suggestions.
Step 4: Finalizing and Entering the Editor
Once you are satisfied with your initial setup, click Go to Listing Editor (or the Back to Editor button at the top of the page).
You have now successfully created your listing project! All the data you provided—competitors and keywords—will now be visible and active within the Editor, providing real-time feedback as you begin crafting your content.
What’s Next?
Now that your project is created, follow the rest of our series to master the optimization process:
Competitor Analysis and the Leaderboard: How to beat the competition using side-by-side data.
Working with the Keyword Bank: From Chaos to System: Deep dive into keyword organization and metrics.
The Art of Optimization: The Editor and AI Assist: Learn to use the smart editor and AI creative tools.
Publishing, Version History, and the Amazon API: Finalizing and going live.